installation
_________________
1.download Reshade
2.run Reshade on no mans sky(install all shaders and textures when asked)
3.copy all .ini files to Binaries
4.use Reshade to load setting files
a Reshade settings pack for no mans sky in alpha
Your web browser, Internet Explorer is out of date.
Please download one of these up-to-date, free and excellent browsers:
Microsoft Edge, Mozilla Firefox, Google Chrome or Brave Browser
installation
_________________
1.download Reshade
2.run Reshade on no mans sky(install all shaders and textures when asked)
3.copy all .ini files to Binaries
4.use Reshade to load setting files
a Reshade settings pack for no mans sky in alpha

Does the plethora of chemical inaccuracies in No Man’s Sky bug the hell out of you? If you’ve taken basic chemistry class and even paid the least bit of attention, it probably bugs you that you can’t just lap some hydrogen and nitrogen together to get ammonia, or the fact dioxite is notated as CO2, yet it’s a different “element” and you can’t react some oxygen with carbon to get some of that sweet blue drank.
Well, do I have the mod for you? (The answer is yes, yes I do.)
If you liked my previous mod Chemically Correct, then you’ll be happy to know this is that mod but on gorilla steroids.
All elements that should be compounds or diatomic elements and such have been totally redesigned in a vanilla look so you can actually tell what the hell you’re looking at.
No longer will you have to search the wiki for how the hell to make oxygen through convoluted metal combinations!
Away are the days you have to wonder “how the hell did I turn pure phosphorus into a plant?”
Do you know the chemical equation to make pyrite?
Great! Go grab some iron and sulfur (sulphurine in-game) and make yourself some rocket fuel!
If you’d like to extract some ammonia from some fungus, just slap that plant in a refiner and add a catalyst (the reward varies on the strength)
__________________________________________________________________
If this mod seems unbalanced, or you have any suggestions or bugs PLEASE message me about what the issue is so I can fix it ASAP.
This mod is my baby and I intend to care for it.
Contact me preferably through Reddit (u/PetrikM) or discord (@petrik#0940).
__________________________________________________________________
This mod was nearly impossible, but with the help of the new modding tool AMUMSS (nexusmods.com/nomanssky/mods/957) it was possible.
I’d like to personally thank and credit AMUMSS devWberto a hell of a lot for all of the help he gave me in making this mod possible, as it took many many hours to find and delete all 167 trash recipes from the game and add about 50 new ones. Without AMUMSS this process would have been very difficult to locate every recipe and delete them correctly along with adding the new recipes, without compiling errors. By coding loops in Lua, we were able to efficiently and effectively delete all of these recipes whilst avoiding file errors. With his help, I was able to successfully make this mod reality, so I can finally use refiners without getting super pissed. If you are a modder I HIGHLY recommend this tool, as it makes editing EXML files a hell of a lot easier, especially for large scale projects such as this one.
NOTE: THIS MOD EDITS THE FILE DEFAULTREALITY.MBIN, ANY OTHER FILE DOING SO WILL CAUSE NMS TO VOMIT AND DIE
To combine this mod with another that edits DEFAULTREALITY.MBIN it must be coded with AMUMSS.
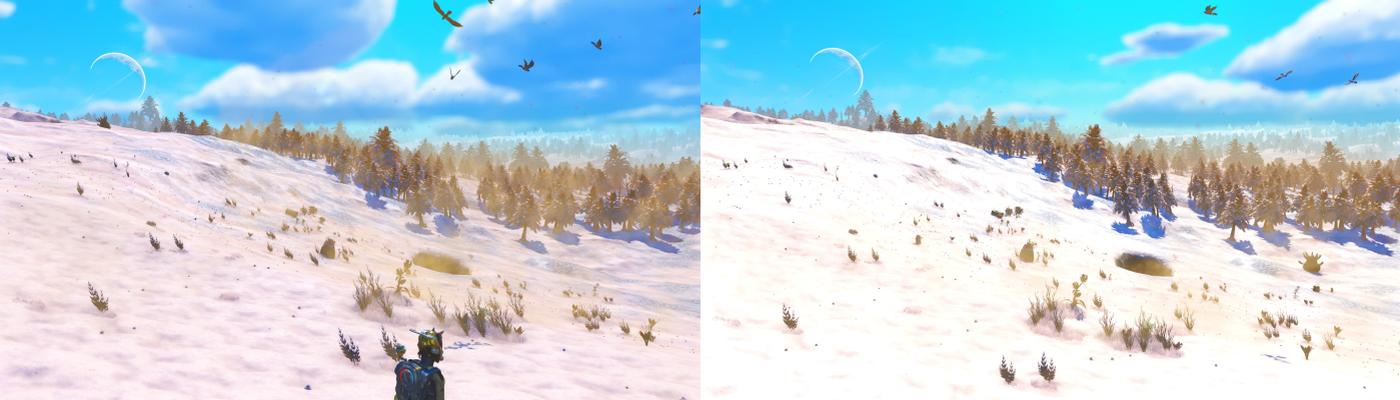
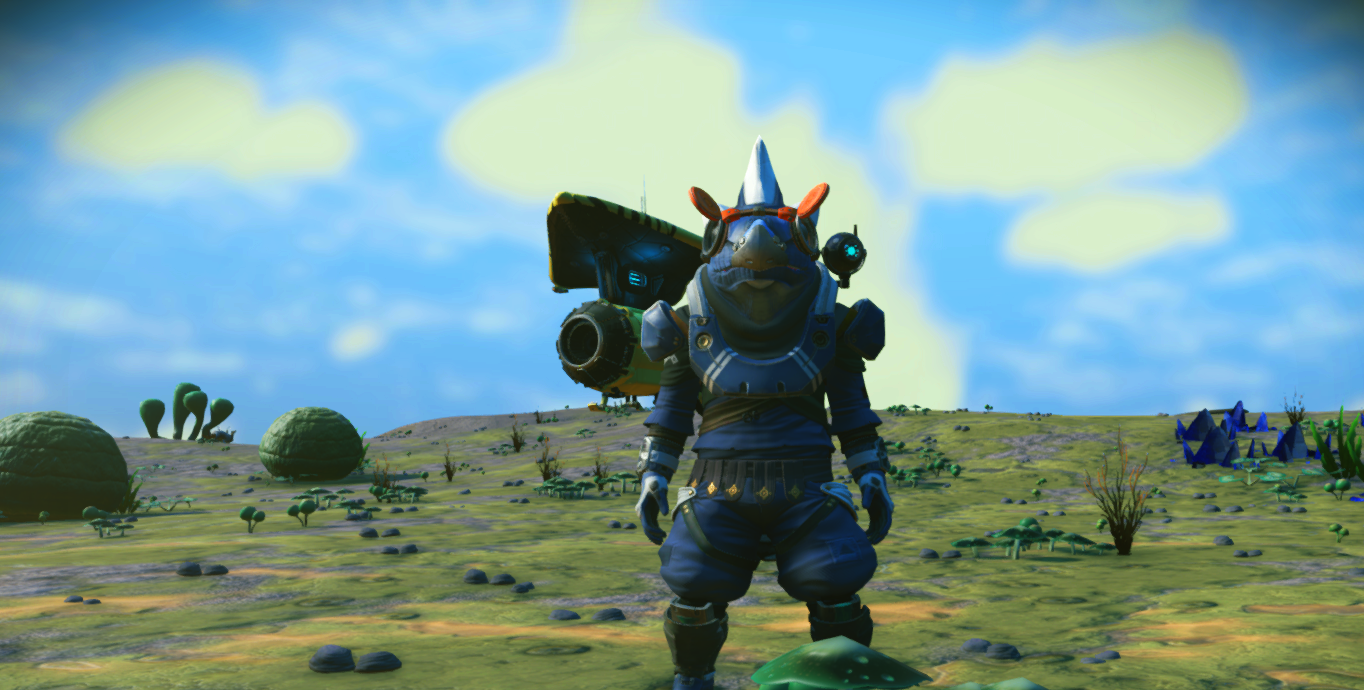
This mod increases the intensity of sunlight, making all landscapes (and even spacescapes) look more vibrant.
Snow can be searingly bright at high noon times, desert and beach sand will look more vibrant, planets in space will look more luminous and so on.
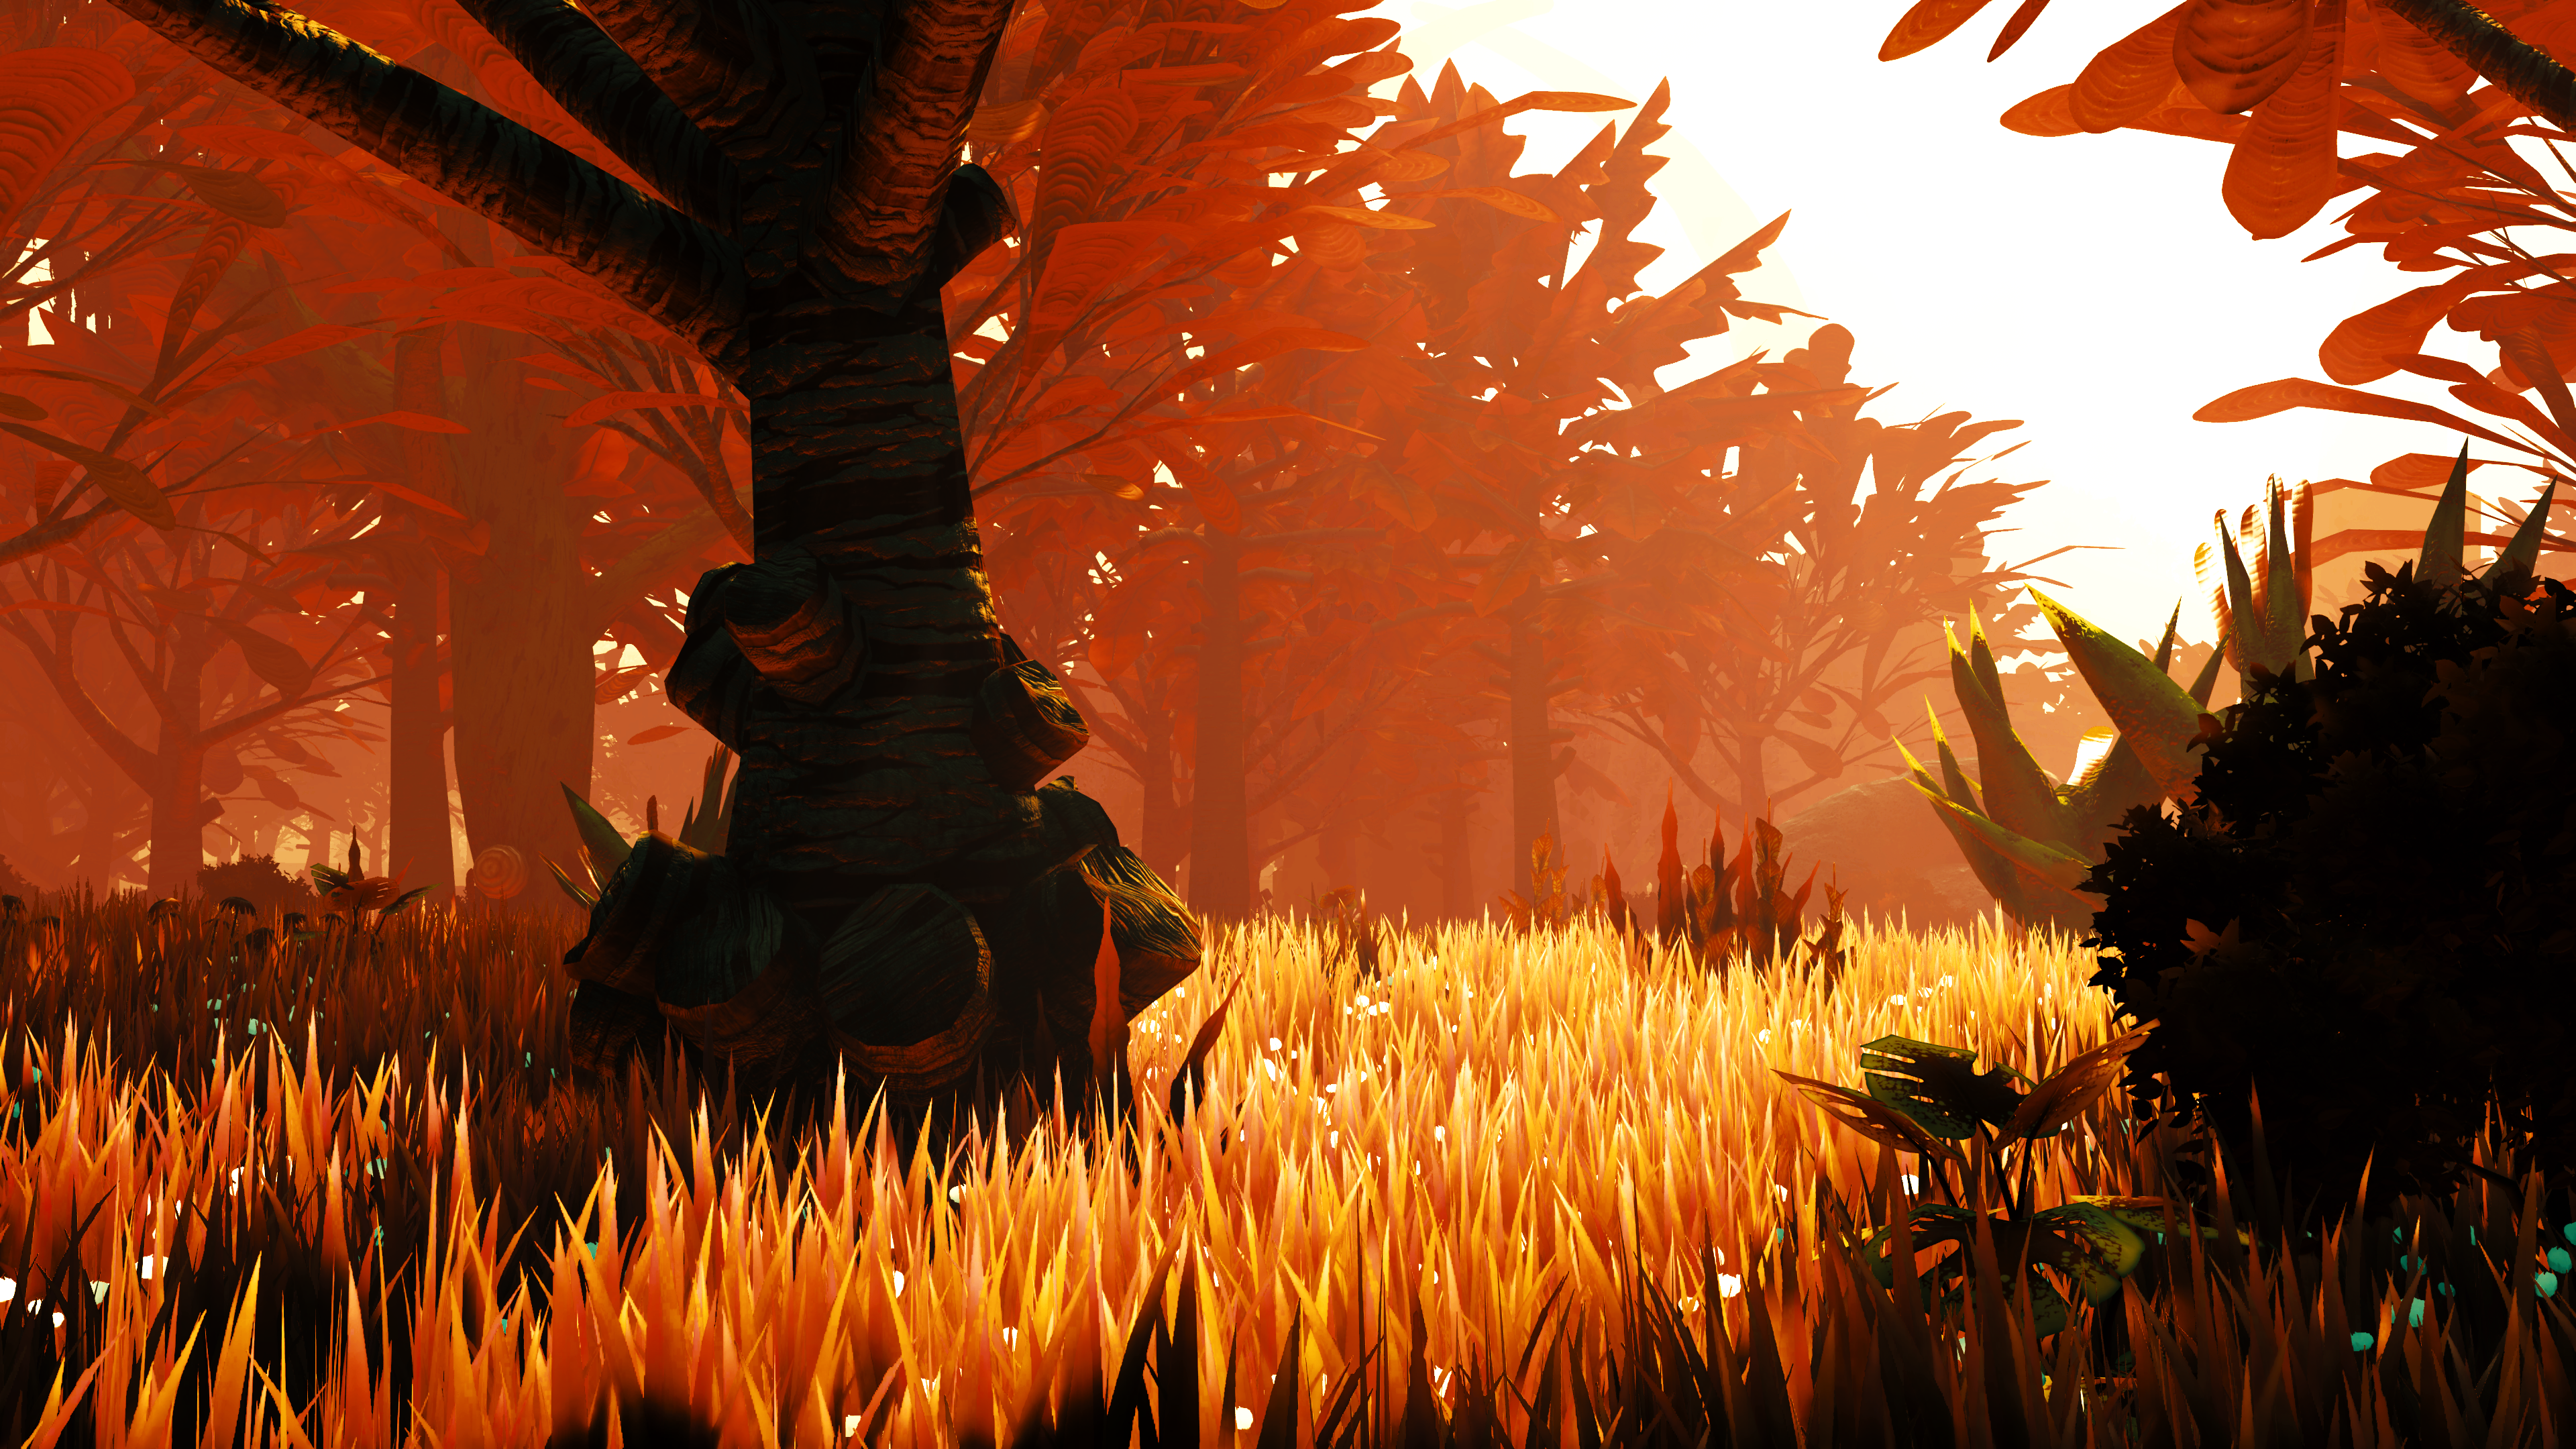
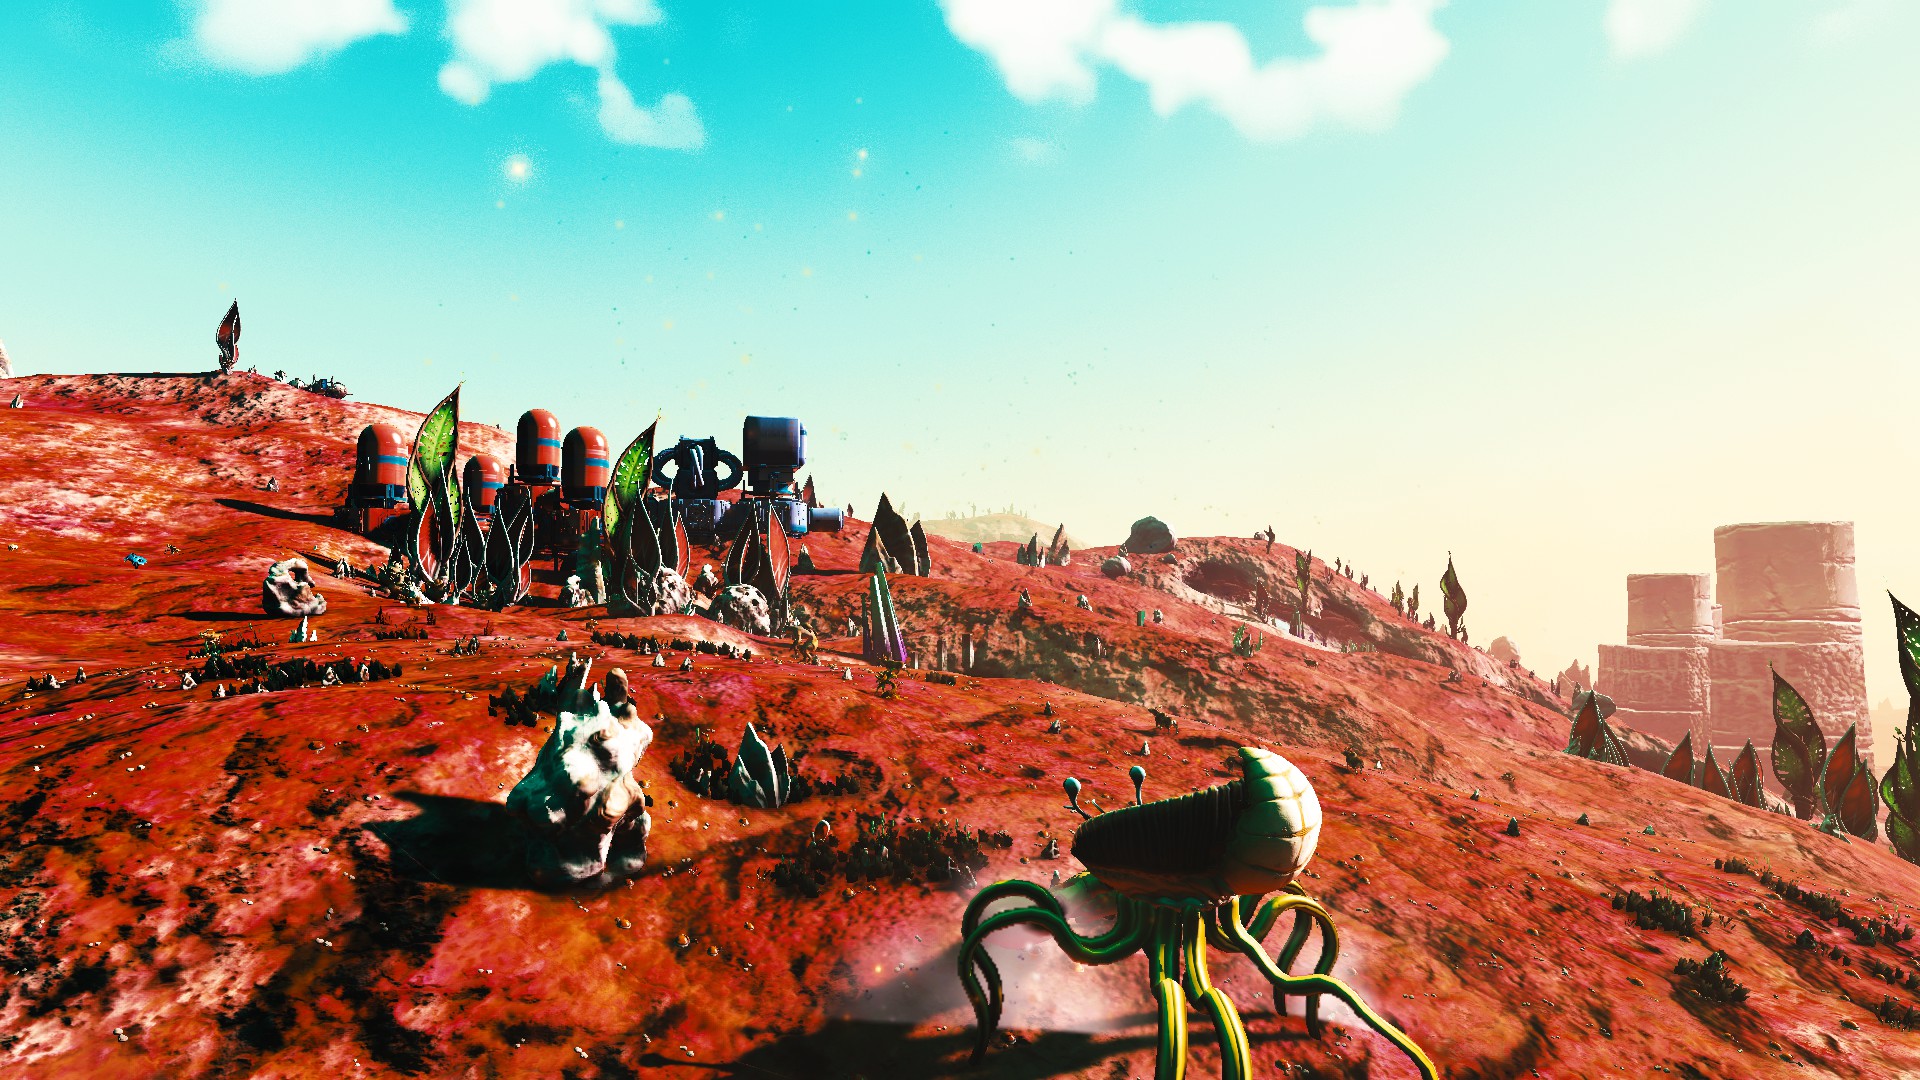
This is a mod pack for people that are still playing the Pathfinder Update and want to use old mods that work with Pathfinder. This mod pack also includes instructions on how to downgrade to the Pathfinder Update on PC if needed. Most of the mods on this site only work for NEXT, so I’ve compiled some legacy mods in this pack that can be used with the Pathfinder Update. Some of the mods are not mine so credit goes to the respective authors.
Some of the best mods in this pack are the Megaliths mod which creates amazing giant stuff on planets, and also a Pulse Drive mod that makes it much easier to travel between planets. The Pathfinder Update, along with these mods, creates the best visual version of NMS ever created! Prepare to take lots and lots of pictures.
Here are a bunch of screenshots I took using recommended mods inside this pack: https://imgur.com/a/qD4JNCB
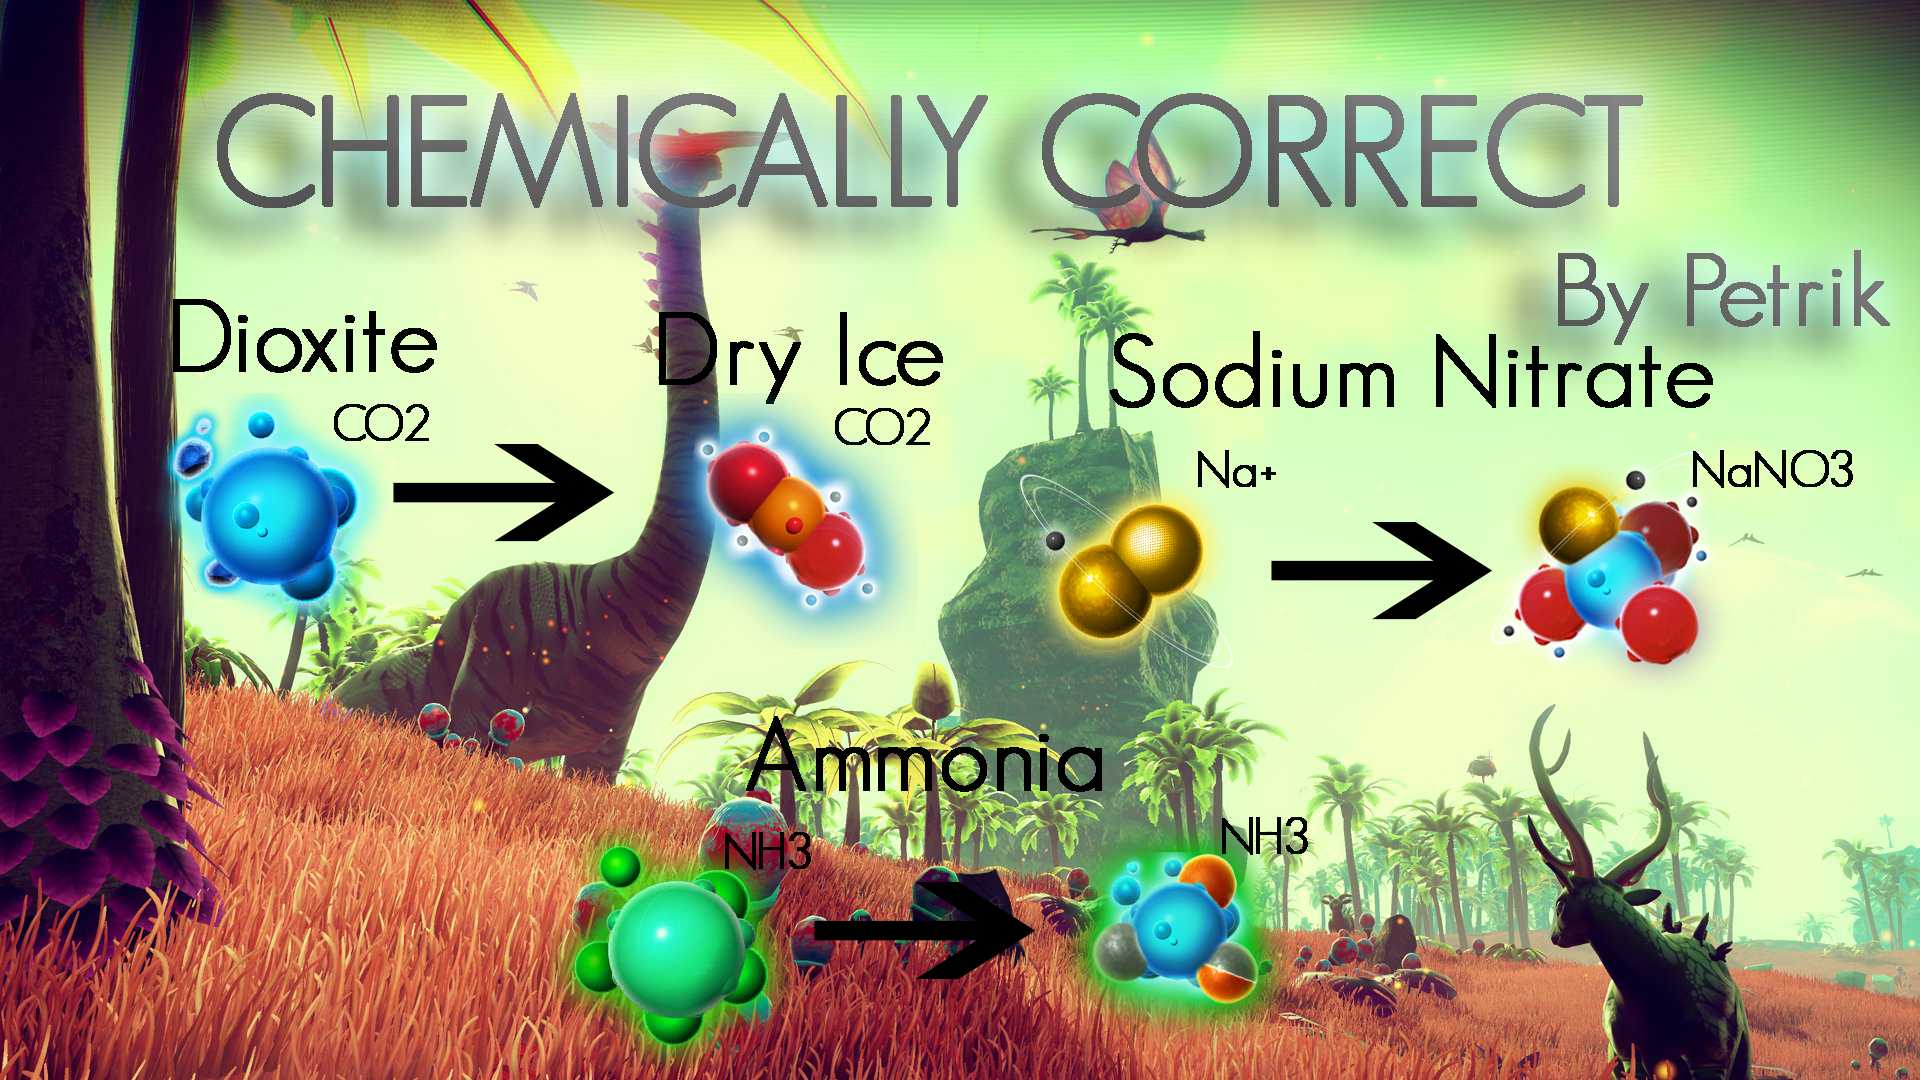
Do the game’s chemical inconsistencies ever bother the hell out of you? No? Maybe it’s just me.
Regardless, this mod fixes that.
This is my first mod, fueled by my pet peeve of scientific inaccuracies. It essentially just replaces the icons and elemental abbreviations with artistically correct renditions of how the molecules should actually look (for the most part). It retains the same atomical artistic style of the game, the icons are just slightly altered to match the actual molecular structure of the resources they’re supposed to represent.
Big thanks to monkeyman192 for helping me find all the file locations, as well as Lo2k for his language file editor!
https://www.nexusmods.com/nomanssky/mods/658
Please let me know if there are any inaccuracies in the renditions or any changes you’d like to suggest.
My next goal for a mod is to build upon this to support chemical reactions such as di-hydrogen and nitrogen combinations to create ammonia.
Please READ EVERYTHING, INCLUDING FULL INSTALLATION NOTES, before downloading or asking questions.
CLICK HERE to open Flickr Album with 146 high resolution before and after screenshots. It’s really hard to see the difference in the tiny thumbnails on this site.
If the screenshots look REALLY dark to you, or if you install the ReShade and it’s REALLY dark, it’s because your monitor isn’t calibrated properly. The look of this ReShade is heavily dependent on your monitor’s brightness and contrast being properly calibrated. If you don’t know how to calibrate your monitor, here is a link showing you how: How To Calibrate Your Monitor on Windows 10
Having said that, it is suppose to be a little darker in general and nights are suppose to be much darker with this ReShade. You will absolutely need to use your flashlight at night and in most caves. You can see for yourself in some of the before and after screenshots.
Before calibrating, if you’re using an Nvidia card, open Nvidia control panel, go to “change resolution”, scroll down, click on “Use Nvidia color settings”, change to the following settings and click “Apply” at the bottom.
Desktop color depth – Highest(32 bit), Output color depth – Highest number available, Output color format – RGB, Output dynamic range – FULL
Okay, so, like my previous ReShades, I really just made this for myself to suit my own personal taste and I’m taking the time to upload here just in case anyone else would like to use it. If you hate the way it looks, you really don’t need to tell me. I don’t care.
My primary goal with this ReShade is to give the game a more realistic, cinematic look while being as lightweight as possible. I average about 5 fps less with this ReShade, although some areas I do see up to 10 fps less. This number will vary based on your hardware.
You can use whatever graphics settings you want. I recommend that your gamma be turned up to 128.
I’m using the following visual mods in my screenshots:
Space Dream (standard version)
You don’t have to use any of these mods. This ReShade works and looks nice with the vanilla game as well, but your game may look slightly different from my screenshots if you’re not using these mods.
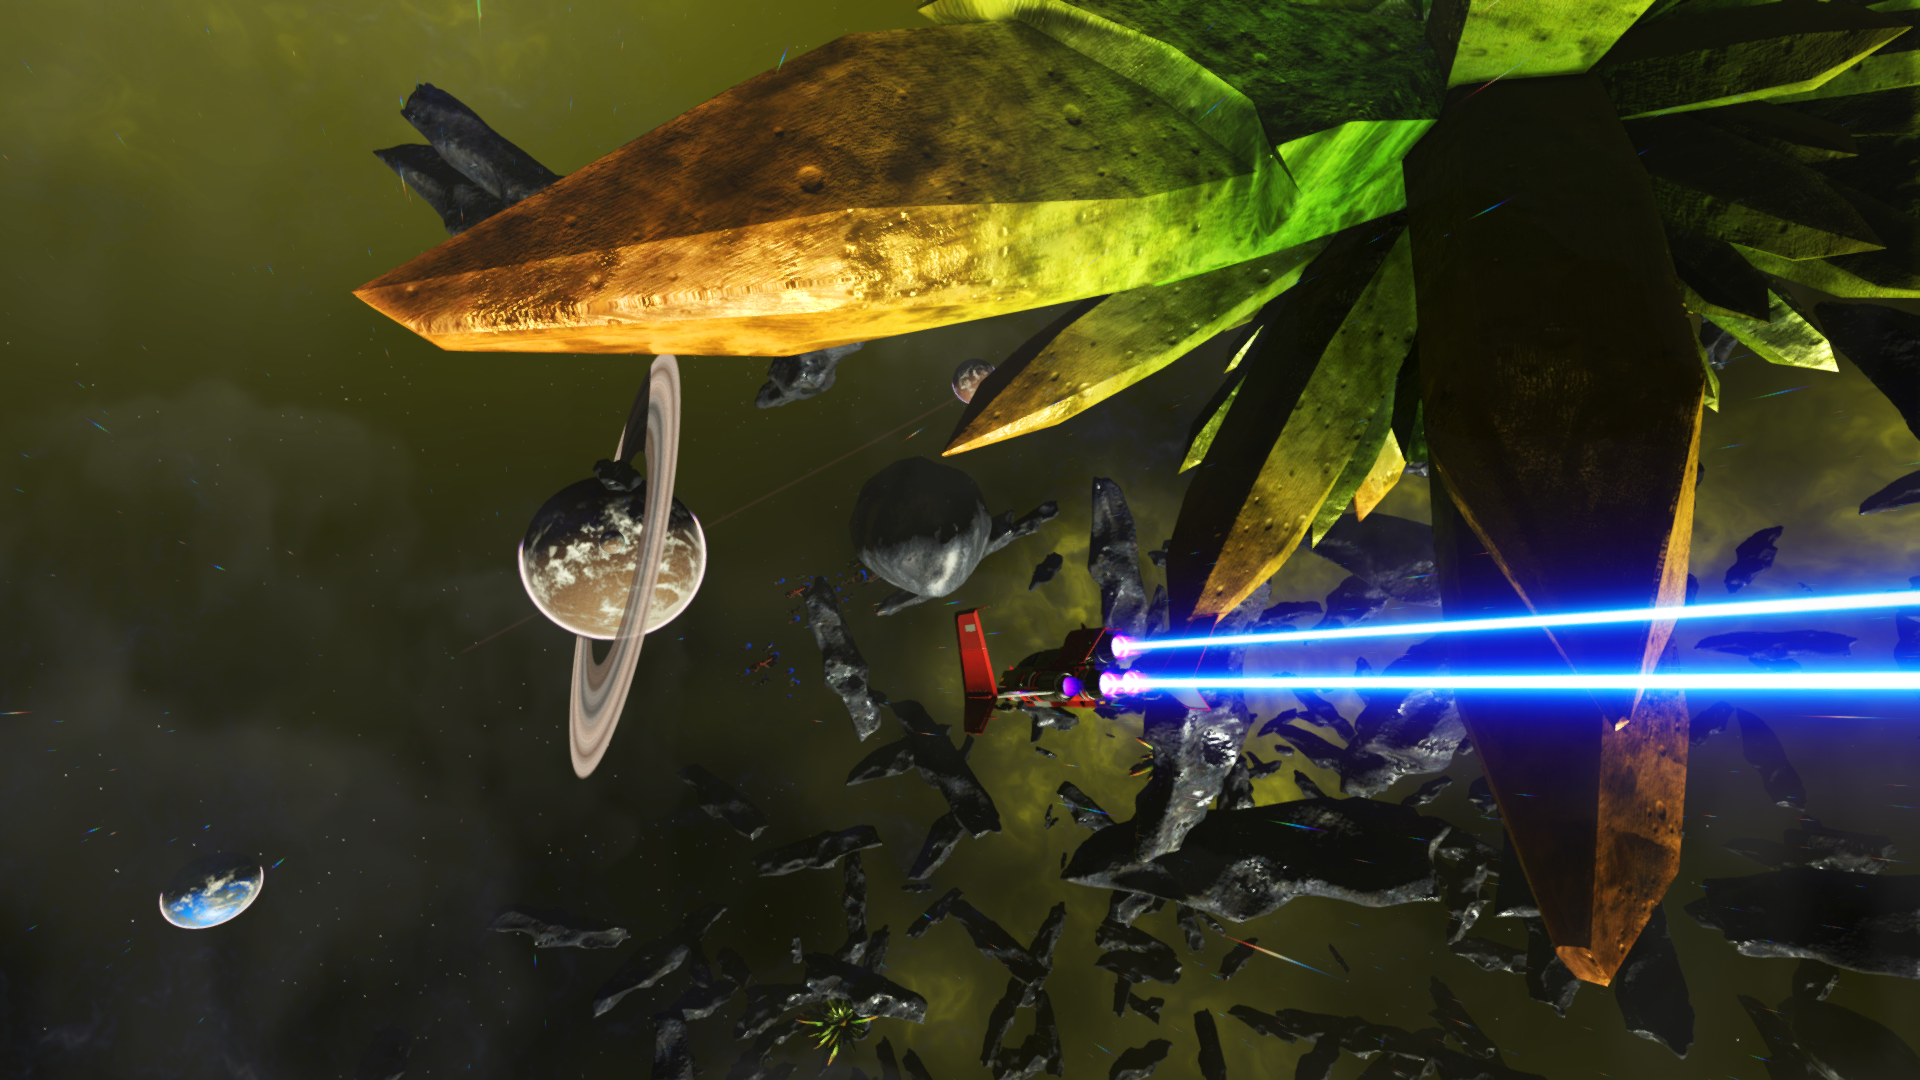
What this ReShade does: Sharpens Textures, Reduces over-saturated lighting and colors, resulting in more realistic, less plastic looking textures with more detail and more realistic lighting. Overall, this ReShade brings a clean, clear, crisp, modern sci-fi cinematic look to the game. The screenshots will give you a good idea, but you really have to see it in motion for the full effect. I can’t stress this enough, you really do have to see it in motion to get the full idea of the difference it makes.
This ReShade dramatically changes the look and feel of the game. If that’s not what you’re looking for, you won’t like it. If you’re looking for a more subtle change, you might want to give my last one a try. It still works fine. You can find that HERE.
You can hit the “home” key in game to open the ReShade configuration and turn off any individual fx that you don’t want or if you just want to experiment. Hit the numpad+ key to toggle the entire thing on and off while playing. Hit numpad- to take a screenshot. You can change where screenshots are saved in the configuration tab after hitting shift + F2.
BONUS PERFORMANCE NOTES:
After an absolute ton of experimenting with different settings in the TkGraphicsSettings file found in No Man’s Sky\Binaries\SETTINGS, these exact settings have given me the best performance I’ve ever had in this game. Solid 60+ in space and in stations and 35 – 60 on planets depending on the planet. More importantly, the game is silky smooth with absolutely no stuttering or freezing ever, which makes the dips down to 35 feel and look just as good as 60, and that’s WITH this ReShade running. Without it, I get around 5-10 fps more. So, even if you have no interest in using my ReShade, you may want to read through this if you’re having trouble getting good performance.
My build is an i7 3770, GTX 1050Ti 4GB, 16GB DDR3 RAM. Obviously, I can’t guarantee this is the best setup for your system, but can’t hurt to try it even if you aren’t using this ReShade.
NumHighThreads needs to be the number of threads on your cpu and NumLowThreads needs to be the number of physical cores on your CPU. This is one you can play around with a little bit because people are reporting vastly different results when experimenting with these numbers. Basically, one of them needs to be physical cores and one of them needs to be total threads, you can try it both ways to see which works best for you. Alternatively, some have reported that setting both to zero gave them the best performance. THIS IS THE SINGLE MOST IMPORTANT SETTING YOU NEED TO GET RIGHT. Literally made a 20 fps difference once I changed it from the default settings.
“FullScreen” value=”true”
“Borderless” value=”false”
“UseScreenResolution” value=”true”
“ResolutionWidth” value=”1920″
“ResolutionHeight” value=”1080″
“VsyncEx” value=”Off”
“GSync” value=”false”
“ShadowDetail” value=”Normal”
“TextureDetail” value=”Ultra”
“GenerationDetail” value=”High”
“ReflectionsQuality” value=”Normal”
“AntiAliasingEx2″ value=”TAA_FXAA”
“MotionBlurQuality” value=”Off”
“TerrainQualityEx” value=”High”
“MotionBlurStrength” value=”0.000000″
“AnisotropyLevel” value=”16″
“FoVOnFoot” value=”100.000000″
“FoVInShip” value=”100.000000″
“Brightness” value=”128″
“MaxframeRate” value=”160″
“NumHighThreads” value=”8″
“NumLowThreads” value=”4″
“TextureStreamingEx” value=”On”
“TexturePageSizeKb” value=”32″ – (You may have to add this line. The full code to add is: <Property name=”TexturePageSizeKb” value=”32″ />
“ShowRequirementsWarnings” value=”true”
“RemoveBaseBuildingRestrictions” value=”false”
“MouseClickSpeedMultiplier” value=”0.500000″
“AmbientOcclusion” value=”HBAO”
“UseTerrainTextureCache” value=”true”
“UseArbSparseTexture” value=”false”
“EnableTessellation” value=”true”
“UseHDR” value=”true”
“UseLightshafts” value=”true”
I also have the following settings changed in Nvidia Inspector:
Maximum pre-rendered frames = 1
Triple buffering = on
Vertical Sync – Force On
Power Management Mode = Prefer Maximum Performance
Shadercache = Off
Multi display/mixed GPU acceleration – Muti display performance mode (put on single display if you only have one monitor)
The next few settings are way down under the “other” section.
Memory Allocation Policy = WKS_MEMORY_ALLOCATION_POLICY_AGGRESSIVE_PRE_ALLOCATION
OpenGL default swap interval fraction = OGL_DEFAULT_SWAP_INTERVAL_FRACTIONAL_ZERO_SCANLINES
OpenGL default swap interval sign = OGL_DEFAULT_SWAP_INTERVAL_SIGN_NEGATIVE
Lastly, I’ve also found that setting the priority for NMS.exe in task manager to realtime seems to make a difference in the smoothness for me.
Again, I can’t promise any of this will change your performance, but I thought I’d post the settings I’m using to get great performance and you can do what you want with the information.
I Introduce XurloK’s Filter Swap Plus Sharpening.
this mod basically swaps out the default filter with one of the filters in this mod plus you have sharpening addition to the collection without the need of Reshade mods also just made a InjFX_settings.h file incuded with download.
Filters in this pack are the following:
“FILMIC” “HYPERREAL” “IDENTITY“
“VINTAGE” “WEIRD2” “WEIRD4” “WEIRD5“
That will be all I’ll be adding but won’t need to update cause how I made the mod cheers!
Caution all in-game screenshots will or maybe look different than yours!
If there are any problems please leave Feedback about the issue i’ll get to you soon. 🙂
Please READ EVERYTHING before downloading or asking questions.
CLICK HERE to open Flickr Album with many more large, high resolution before and after screenshots. It’s really hard to see the difference in the tiny thumbnails on this site.
If the screenshots look REALLY dark to you, or if you install the ReShade and it’s REALLY dark, it’s because your monitor isn’t calibrated properly. The look of this ReShade is heavily dependent on your monitor’s brightness and contrast being properly calibrated. If you don’t know how to calibrate your monitor, here is a link showing you how: How To Calibrate Your Monitor on Windows 10
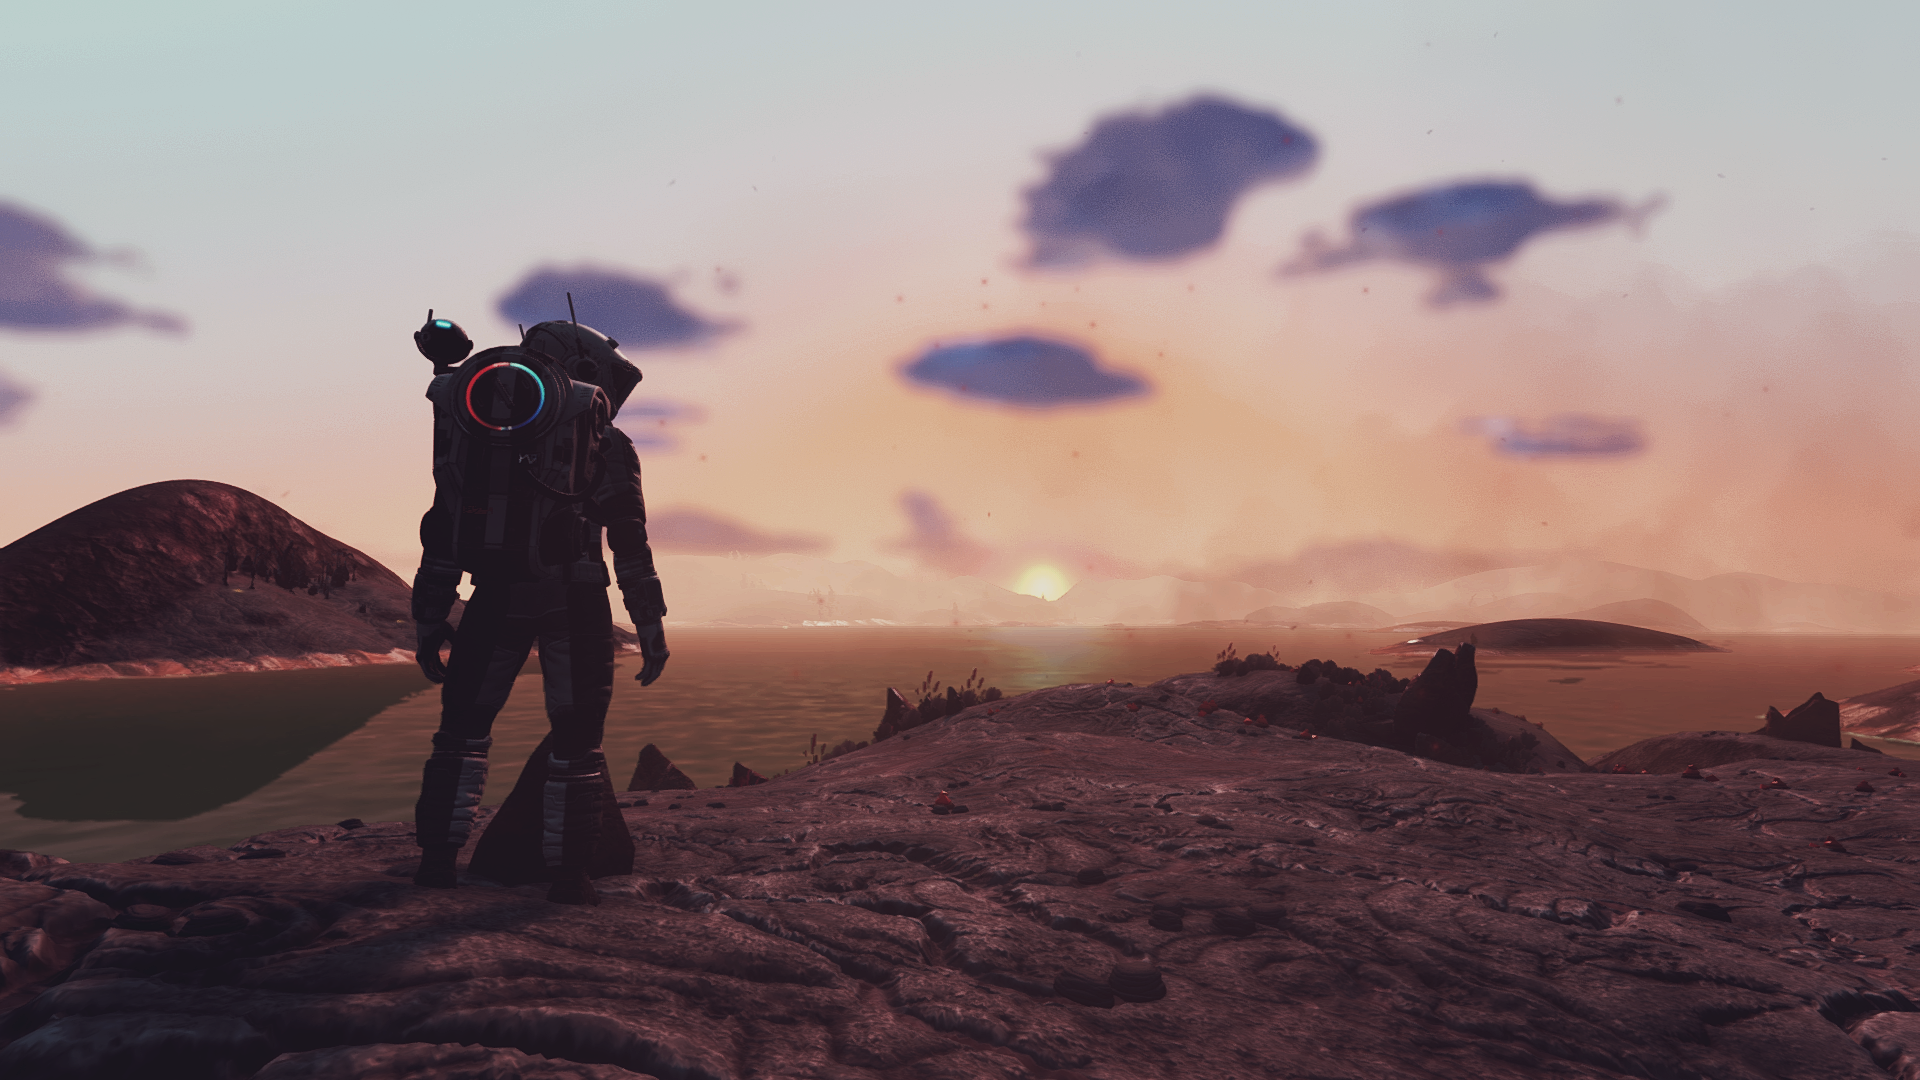
I stopped playing for a long time and was a little surprised when I came back to find that my old ReShade (Found Here) for Atlas Rises had almost 5,000 downloads, so I decided to do an updated version for NEXT. Like the previous ReShade, I really just made this for myself and I’m uploading here just in case anyone else would like to use it.
My primary goal with this ReShade is to give the game a more realistic look while being as lightweight as possible. I spent about 20 hours tweaking this before settling on this final version that I believe impacts the visuals the most while impacting performance the least. I average about 5 fps less with this ReShade, although some areas I do see up to 10 fps less. This number will vary based on your hardware.
You can use whatever graphics settings you want. I recommend that your gamma be turned up to 128. The screenshots I’ve provided are 1920×1080 at max settings.
The only visual mod I’m using in screenshots is: Clean UI for NEXT
So, the changes you see in the screenshots are due to this ReShade and nothing else.
What this ReShade does: Sharpens Textures, Reduces over-saturated lighting and colors, resulting in more realistic, less plastic looking textures with more detail and more realistic lighting. Greatly reduces color banding in sky, especially at night. Overall, this ReShade results in a clean, clear, crisp look to the game. The screenshots will give you a good idea, but you really have to see it in motion for the full effect.
You can hit shift + F2 in game to open the ReShade configuration and turn off any individual fx that you don’t want or if you just want to experiment. Hit the numpad+ key to toggle the entire thing on and off while playing. Hit numpad- to take a screenshot. You can change where screenshots are saved in the configuration tab after hitting shift + F2.
PERFORMANCE NOTES:
After an absolute ton of experimenting with different settings in the TkGraphicsSettings file found in No Man’s SkyBinariesSETTINGS, these exact settings have given me the best performance I’ve ever had in this game. Solid 60+ in space and in stations and 35 – 60 on planets depending on the planet. More importantly, the game is silky smooth with absolutely no stuttering or freezing ever, which makes the dips down to 35 feel and look just as good as 60, and that’s WITH this ReShade running. Without it, I get around 5-10 fps more.
I also have the following settings changed in Nvidia Inspector:
Maximum pre-rendered frames = 1
Triple buffering = on
Vertical Sync – Force On
Antialiasing Mode = Enhance the application setting
Antialiasing Setting = 2x [2x Multisampling]
Antialiasing Transparency Multisampling = Enabled
Antialiasing Transparency Supersampling = 2x Supersampling
Power Management Mode = Prefer Maximum Performance
Multi display/mixed GPU acceleration – Muti display performance mode (put on single display if you only have one monitor)
Memory Allocation Policy = WKS_MEMORY_ALLOCATION_POLICY_AGGRESSIVE_PRE_ALLOCATION (have to scroll way down for this one, it’s under “other” settings
My build is an i7 3770, GTX 1050Ti 4GB, 16GB DDR3 RAM. Obviously, I can’t guarantee this is the best setup for your system, but can’t hurt to try it even if you aren’t using this ReShade.
NumHighThreads needs to be the number of threads on your cpu and NumLowThreads needs to be the number of physical cores on your CPU. This is one you can play around with a little bit because people are reporting vastly different results when experimenting with these numbers. Basically, one of them needs to be physical cores and one of them needs to be total threads, you can try it both ways to see which works best for you. Alternatively, some have reported that setting both to zero gave them the best performance.
“FullScreen” value=”false”
“Borderless” value=”true”
“UseScreenResolution” value=”true”
“ResolutionWidth” value=”1920″
“ResolutionHeight” value=”1080″
“VsyncEx” value=”Off”
“GSync” value=”false”
“ShadowDetail” value=”Normal”
“TextureDetail” value=”Ultra”
“GenerationDetail” value=”High”
“ReflectionsQuality” value=”Normal”
“AntiAliasingEx2″ value=”TAA_LOW”
“MotionBlurQuality” value=”Off”
“TerrainQualityEx” value=”Ultra”
“MotionBlurStrength” value=”180.000000″
“AnisotropyLevel” value=”16″
“FoVOnFoot” value=”100.000000″
“FoVInShip” value=”100.000000″
“Brightness” value=”128″
“MaxframeRate” value=”160″
“NumHighThreads” value=”8″
“NumLowThreads” value=”4″
“TextureStreamingEx” value=”On”
“TexturePageSizeKb” value=”32″
“ShowRequirementsWarnings” value=”true”
“RemoveBaseBuildingRestrictions” value=”false”
“MouseClickSpeedMultiplier” value=”0.500000″
“AmbientOcclusion” value=”HBAO”
“UseTerrainTextureCache” value=”true”
“UseArbSparseTexture” value=”false”
“EnableTessellation” value=”true”
“UseHDR” value=”true”
“UseLightshafts” value=”true”
Again, I can’t promise any of this will change your performance, but I thought I’d post the settings I’m using to get great performance and you can do what you want with the information.
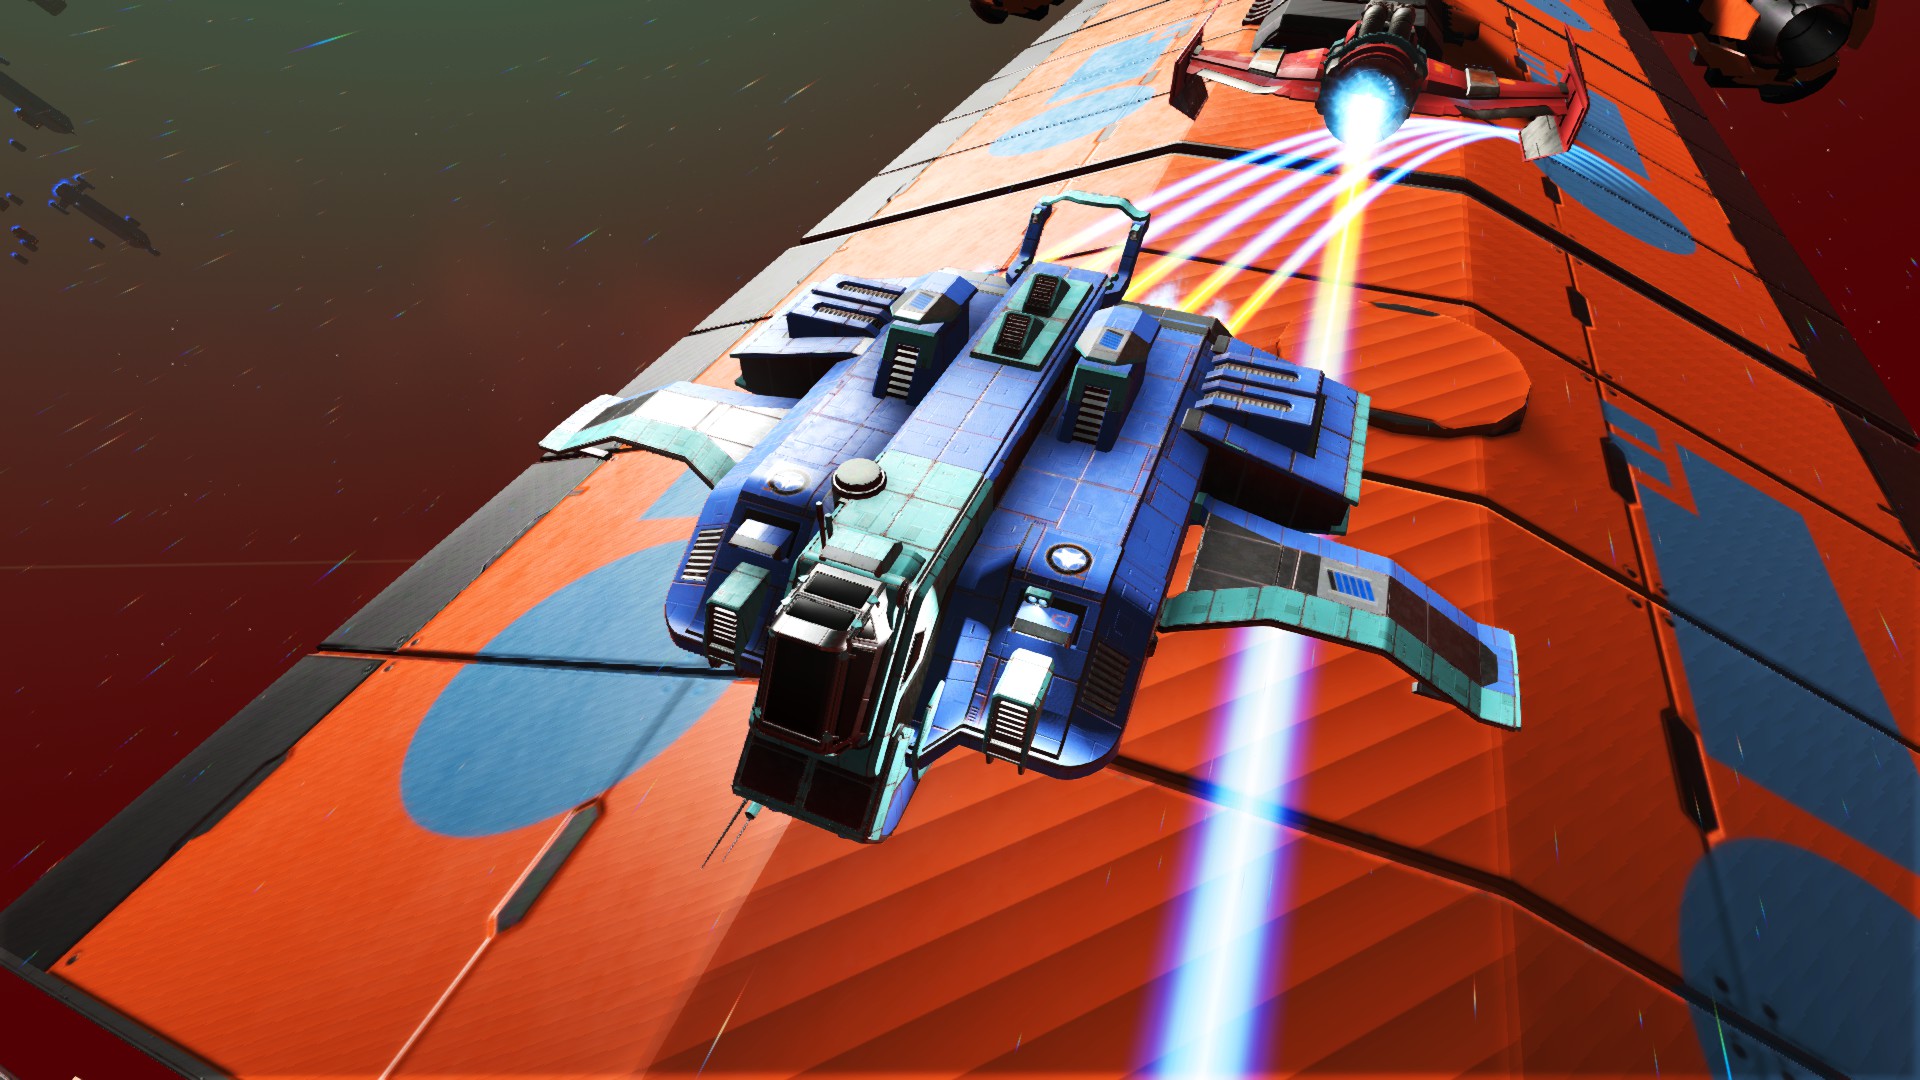
A simple mod that changes the color palette for shuttles to be more like other ships. Done with text editing of SHUTTLE.TEXTURE.MBIN. Any mods that modify this file won’t be compatible (unlikely). No textures edited.
This is a very simple performance mod that totally deactivates reflections when set to “Low” in your graphics settings.
Reflections look great when set to “High” or even “Medium”, but tend to blur the image when set to “Low”, while staying quite demanding on some systems. This mod is aimed at people with low-end machines or that need the extra fps.
Video Game Mods is bringing modding communities together under a unified network. The original community creator retains control over the content and community for the game.
We allow modders to manage their own modding community using our platform for hosting and sharing mods, unlimited usage to grow your community without the hassle of hosting.
Get in touch© Video Game Mods | Help | Policy | Cookies
Back To Top